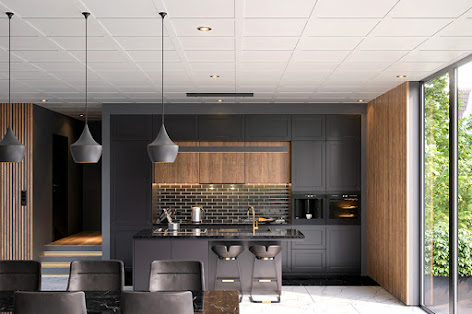
A High End Coffered Ceiling, At a Affordable Price
Easy Installation, Eye-Catching
Embassy Laminated Tiles are installed quickly thanks to an innovative rail and anchoring system. Supported by a sturdy structure with a clearance of 1-3/4", Embassy ceilings are elegant, maintenance-friendly and timeless.
Contemporary Design
Sleek and timeless, the coffers blend in with any decor. excellent quality finish with no visible nails or screws. The Tiles are also compatible with recessed lights.
Access to Piping
The Embassy system allows only 1-3/4" space between the structure ceiling, maximizing the height of the room, while maintaining access to all the ducts, pipes, or electrical cables. The rail system also enables you to adjust the height and even level a ceiling slightly, if necessary.
Quick Installation
Installing an Embassy ceiling requires half the installation time of a traditional suspended ceiling. For two people with the right tools, a Standard sized room can be covered in a weekend.
Installation
Materials Required,
Rails & Anchors
Main Crossbars
Secondary Crossbars
Ceiling Panels
Installation Template Bar
#8 x 1" Domed head Wood Screws
Furring Strips*Typically 1" x 3" Strapping* (Optional)
01 - Prepare the Installation
Locate the center of the ceiling space to be covered and use a chalk line to draw the rooms center line. Note that the main crossbars must be installed in the opposite direction of the joists.
Next visualize how the panels will be placed by arranging them on the floor leaving about a 2"" space between each panel. Determine id you have to install the ceiling beginning with centered tiles or centered crossbars.
Tip - Before installing the panels and crossbars, open the boxes and allow the material to acclimatize to eh room at least 48 hours.
02 - Install the Anchors
Starting in the center of the room, install anchors on every joist using the installation template. This template allows you to measure the correct distance between the anchors as well as between the anchors and the wall. Anchors must be installed on every joist. note that the distance between 2 anchors on the same main cross bar should never exceed 24". If the joists are not level add furring strips to level.
Tip - We recommend using #8 x 1" Domed head Wood Screws.
03 - Install the Rails
Now slide the rails into the main crossbar, you will need 6 rails per full length main crossbar. Because the rails have to support the weight of the ceiling it is important to always use the required number of rails and not cut them.
Tip - The rail and anchor system allows to slightly level your ceiling if needed. Note that it is not recommended to install the entire ceiling on the last level of the rails.
04 - Install the Main Crossbars
You can now install the main crossbars by sliding the rails into the anchors that have been secured to the joists across the entire span of the room. To avoid and pendulum effects during installation, we recommend that you install the main crossbars followed by 1 or 2 rows of secondary crossbars, including any cut crossbars. To fit the crossbars together use the tongue and groove portions and slide a rail int place at every joint.
05 - Install the Tiles and Secondary Crossbar
Add the panels and secondary crossbars by starting in the center of the room and alternating on either side
Embassy Ceiling Tiles are a affordable and Easy solution for those who want a more sophisticated looking ceiling while still having the ease of access Drop ceilings afford. Get started by contacting a Experienced Sales Associate at Chamberlain Timber Mart today!


Comments
Post a Comment