Top 6 Expert Painting Tips
Painting can have a huge effect on any room in your home. It requires prep work, patience, and elbow grease – but with a little extra knowledge, you can get pro results. With these expert tips, you can make sure that every project is a success.
EXPERT TIP #1: CUTTING IN
One of the first painting steps after prep is cutting in. Cutting in is using a brush to paint the edges and corners of your wall, and it’s usually done before rolling. When cutting in, there are a few techniques to help ensure clean lines.
Using a 2″ to 3″ angled brush, make sure the brush is saturated with paint – this will give you the cleanest edges. Hold the brush with your thumb on one side and four fingers on the other to give you the most flexibility when cutting in.
Start by placing the brush about 1/2″ from the edge you are working on, and slowly creep the brush to the edge. Then you can begin your cut-in with a slow, short brush stroke. Extend the painting about 3″ to 4″ from the edge, so you’ll be able to roll over your brush strokes. After painting about 12″, go back in the opposite direction to cover any spots missed. Do this for the entire length and height of your walls. Then, you’ll be ready to roll.
EXPERT TIP #2: MAINTAIN A WET EDGE
This tip goes hand-in-hand with cutting in - by keeping a wet edge you’ll make sure your paint brushing and paint rolling look the same. To do this, it’s wise to work on one wall at a time. After cutting in, take a roller to apply paint over the brush strokes. You’ll want to make sure you keep the roller about an inch or more away from the cut-in edge. Doing this will not only smooth out any paint strokes, but also match the stippling, or texture, that your final rolled wall will have.
![Person on ladder using a brush to apply white color to ceiling with blue tape visible around the edges.](https://www.valspar.com/en/how-to/tips-for-success/expert-tips/_jcr_content/root/container/flexcontainer_197746/card-area/image.coreimg.png/1704987803082/expert-tips-2.png)
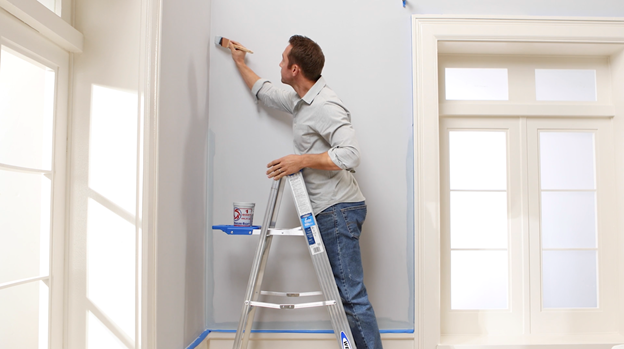
EXPERT TIP #3: LADDER SUPPORT
Most people don’t think twice about climbing a ladder to paint, but how you use your ladder can make a difference in your safety and fatigue.
When you climb a ladder to paint, make sure your chest is being supported by the ladder as you lean in to paint. Otherwise, you risk losing your balance or causing unneeded strain.
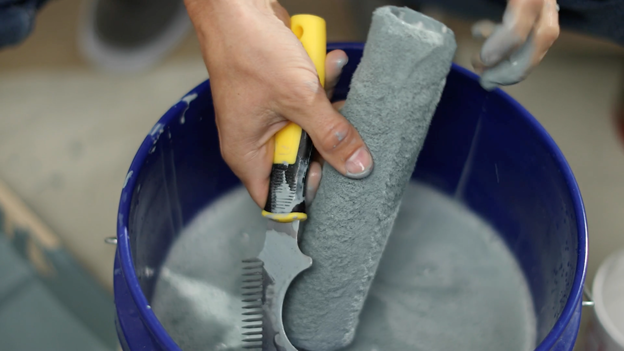
EXPERT TIP #4: LOADING/WIPING YOUR BRUSH
Having the right amount of paint on your brush will save you from having to make too many trips to the paint bucket. When dipping – also called loading – your brush, dip it about 1/3 of the way in. Remove the brush and gently wipe off the excess paint by running it across the inside edge of your can or bucket. If using a paint can, be sure to avoid doing this on the top rim, as it will make a mess when closing your lid. Do this twice to make sure you have enough paint, and remember – a properly loaded brush will not drip.
![Close up of bucket filled with gray color with hand holding a tool and used roller cover.](https://www.valspar.com/en/how-to/tips-for-success/expert-tips/_jcr_content/root/container/flexcontainer_197746/card-area/image_81073037.coreimg.png/1704987804449/expert-tips-3.png)
EXPERT TIP #5: PAINTER’S TOOL/5-IN-1 TOOL
Next to brushes and rollers, a 5-in-1- or painter’s tool is one of the most important tools for any painting project. As the name suggests, it’s highly versatile, with five tools built into one unit.
The painter’s tool can easily squeeze out excess paint from rollers, which helps since rollers can hold almost half a pint of paint, even when you’re done using them. After washing the roller cover, you can also use the tool to squeeze out excess water.
Other uses include opening and closing paint cans, scraping away old paint, corner gauging, and spreading Spackle. You’ll want one of these in your back pocket – literally.
EXPERT TIP #6: PAINT BRUSH STORAGE
Proper care of your brushes will allow you to use them for multiple projects. After cleaning your brushes and letting them dry, you can use the original packaging to help keep the bristles straight. Then they’ll be ready to go for your next project. See the cleanup how-to article for more info on how to properly store your tools.
- Get link
- Other Apps
Comments
Post a Comment